Style Meets Performance: Shop the latest Peter Millar performance wear — comfort never looked this good. Shop Now
Tag:

Beauty tricks

Beauty tips: Step-by-step guide to achieving a no-makeup look for every  occasion | Fashion Trends - Hindustan Times

In the world of beauty, mastering the art of makeup can be both exhilarating and overwhelming. From contouring to mastering the perfect winged eyeliner, there’s no shortage of techniques to perfect. However, fear not! In this article, we’ll explore some ingenious beauty hacks that will help you achieve a flawless look in no time. Say goodbye to makeup mishaps and hello to your best beauty game yet!

Beauty tips: Step-by-step guide to achieving a no-makeup look for every  occasion | Fashion Trends - Hindustan Times

Prepping Your Skin: The Foundation of Flawless Makeup

When it comes to achieving a flawless makeup look, prepping your skin is essential. It’s like building a house – you need a strong foundation to ensure everything else looks polished and put together. Here are some beauty hacks to help you master the art of makeup application:

  • Moisturize: Before you even think about applying makeup, make sure your skin is well-hydrated. Use a lightweight moisturizer that suits your skin type to create a smooth canvas for makeup application.
  • Primer: A good primer can make all the difference in how your makeup looks and lasts throughout the day. Choose a primer that addresses your specific skin concerns, whether it’s pore filling, mattifying, or illuminating.
  • Exfoliate: Regular exfoliation is key to achieving a smooth complexion. Use a gentle exfoliator to get rid of dead skin cells and reveal fresh, glowing skin underneath.

By following these simple beauty hacks, you’ll be on your way to achieving a flawless makeup look that lasts all day. Remember, it’s all about prepping your skin to create the perfect canvas for your makeup masterpiece. Take your time, experiment with different products, and most importantly, have fun!

Contouring Like a Pro: Enhancing Your Natural Features

Contouring is a powerful technique that can enhance your natural features and elevate your makeup game to a whole new level. With a few simple tips and tricks, you can achieve a flawless, sculpted look that will leave you feeling confident and camera-ready.

First and foremost, it’s essential to choose the right shades for contouring and highlighting. Opt for a contour shade that is a few shades darker than your natural skin tone, and a highlight shade that is a few shades lighter. This will create a subtle contrast that will define your features without looking too harsh.

When applying contour, remember to blend, blend, blend! Use a fluffy brush or beauty sponge to seamlessly blend the product into your skin, focusing on the areas where shadows naturally fall, such as the hollows of your cheeks, temples, and jawline. This will create a soft, natural-looking contour that will flatter your face shape.

For a pro tip, try using cream contour products for a more seamless and long-lasting finish. Cream products are easy to blend and can be built up for a more intense contour, making them perfect for special occasions or photoshoots. Just remember to set your cream contour with a translucent powder to lock it in place and prevent any smudging throughout the day.

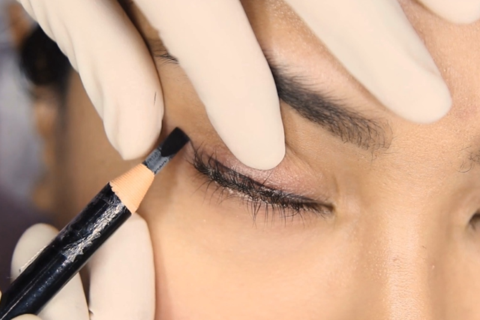
Eyes That Pop: Tricks for Creating Mesmerizing Eye Looks

Looking to up your makeup game and create mesmerizing eye looks that pop? Look no further – we have some tricks up our sleeve to help you achieve stunning results.

First things first, make sure to prime your eyelids to create a smooth base for your eyeshadow. This will help the colors pop and stay put all day long.

Next, don’t be afraid to play with bold and vibrant eyeshadow colors. Experiment with different shades to find what works best for your eye color and skin tone. Remember, the key to creating a mesmerizing look is to blend, blend, blend!

For an extra pop, consider adding a touch of shimmer or glitter to the inner corner of your eyes. This will help brighten your eyes and add a touch of glamour to your look.

Lips that Last: Tips for Perfecting Your Lipstick Application

Having trouble making your lipstick last all day? Don’t worry, we’ve got you covered with some expert tips and tricks to help you perfect your lipstick application. Follow these beauty hacks for a flawless look that will last from morning until night.

First things first, make sure your lips are prepped and ready for lipstick application. Exfoliate your lips to remove any dead skin and create a smooth canvas for your lipstick. You can use a gentle lip scrub or even just a soft toothbrush to slough off any dry patches.

Next, apply a moisturizing lip balm to hydrate your lips and prevent your lipstick from flaking or cracking throughout the day. Allow the balm to sink in for a few minutes before moving on to the next step.

Now it’s time to line your lips with a lip liner that matches your lipstick shade. This will help define your lips and prevent your lipstick from feathering or bleeding. Start by outlining your lips, then fill them in completely with the liner for extra staying power.

Finally, apply your lipstick using a lip brush for precision and control. Start from the center of your lips and work outwards, making sure to fully coat your lips for an even application. Blot your lips with a tissue and reapply another layer for a long-lasting finish. And there you have it – lips that last all day!

In conclusion, mastering makeup is a skill that can elevate your beauty routine and boost your confidence. By incorporating these beauty hacks into your daily routine, you can achieve a flawless look that enhances your natural features. Remember, makeup is a form of self-expression, so have fun experimenting and finding what works best for you. With a little practice and patience, you’ll be well on your way to mastering the art of makeup and achieving a perfect look every time. Embrace your inner artist and let your beauty shine through!

FacebookTwitterPinterestEmail
Master the Art of Winged Eyeliner – Tina Davies Professional

In the realm of makeup application, winged eyeliner ⁣has long reigned as the‌ pinnacle​ of artistry and ⁣precision.⁤ From Hollywood starlets ‍to fashion icons, the winged ⁢eyeliner look has become a timeless beauty staple. But fear not,⁣ mastering this coveted technique ‍doesn’t have to be daunting.‍ With ⁤these insider tips and tricks, you’ll be well​ on your ‍way‌ to creating flawless wings‍ that are sure to turn ‌heads.‌ Let’s⁣ dive into​ the world of winged ‍eyeliner mastery.

Master the Art of Winged Eyeliner – Tina Davies Professional

Perfecting the Wing: Essential Tools and Products

Are you looking to​ master the art of‌ winged eyeliner? ⁢Look no further!⁣ We’ve compiled a list of essential tools and products to help you perfect your winged ‍eyeliner look. Whether you’re a beginner or a seasoned pro, these tips and tricks will take your eyeliner game​ to the next level.

First and foremost, you’ll need a good​ quality liquid ⁢eyeliner. Look ‍for one with⁤ a fine‌ tip that will allow you to create precise‌ lines. **Kat ‌Von D’s Tattoo Liner** is a popular choice among‌ makeup artists for its long-wearing formula and easy application. Another great option is **Stila’s Stay All Day Waterproof Liquid Eyeliner**, which glides on smoothly ‌and‍ stays⁣ put all day.

Next, invest in a good quality angled eyeliner brush. A brush ‌with a fine tip will help you create sharp and clean lines. **MAC’s ​266‍ Small Angle Brush** is a⁢ favorite among‍ beauty bloggers⁤ for its precision ⁢and control. You can also opt for a **drugstore​ dupe** if you’re on a budget. Remember to clean your brush regularly to avoid bacterial buildup.

When⁣ applying⁢ winged ⁤eyeliner, start by⁣ drawing a thin line along your upper lash ⁢line. ⁣Then, extend the line outward⁤ and slightly upward⁢ to create the wing​ shape. Use ⁣short and light strokes to build ‍up the thickness of the⁣ wing. **Practice makes perfect**, so don’t get ⁢discouraged if it ‍takes ‍a few tries to get⁣ it right. Remember,⁢ there’s no such thing as a perfect wing!

Flawless Application: Step-by-Step Guide to ‍Achieving the Perfect ⁢Wing

Mastering the art of winged⁣ eyeliner can be a game-changer for‌ your makeup routine. With⁢ the‍ right tips and ‌tricks, you can achieve the perfect wing every ‍time. Follow these step-by-step instructions to elevate ⁣your eyeliner game.

Step 1:​ Choose the Right Eyeliner

  • Opt for a ⁤gel or liquid‍ eyeliner with a‌ precise ​brush tip for easier application.
  • Ensure the formula⁢ is long-lasting to prevent smudging throughout the day.
  • Experiment with different brands‌ to find the⁢ one that works best for⁤ you.

Step 2: Prep Your Eyelids

  • Start with a clean, dry eyelid to ensure smooth application.
  • Apply a ‍thin layer of​ eyeshadow primer to create a smooth base for ‍the eyeliner.
  • If desired, use a pencil eyeliner to create a guideline for ⁤the wing ‍before applying the gel or liquid liner.
Pro Tip
Use a⁢ small piece of tape angled from⁣ the outer corner of your ⁢eye to ‍create a sharp wing.

Step ​3: Create the Wing

  • Start at the outer‌ corner of your⁤ eye and draw a thin ‍line extending upwards at ‌the desired angle.
  • Connect the line to the rest⁣ of‍ your eyelid, creating⁢ a triangle shape‌ for the wing.
  • Fill in the triangle with small, precise ‌strokes to ensure a smooth and even wing.

With ‍practice and patience, you can master the art of winged eyeliner and achieve a flawless application every time.⁢ Experiment with different techniques and products ‍to⁢ find what works best for you. Remember, practice⁣ makes perfect!

Troubleshooting Common Winged Eyeliner Mistakes

Are you tired of struggling with winged eyeliner? Fear not, because ‍we have‍ some tips and tricks ‍to help you ⁢master the art of creating the perfect winged eyeliner look. One of‍ the most common mistakes ‌people make when applying​ winged eyeliner‍ is not using the right tools. Make sure‌ you have a fine-tipped eyeliner pen or brush ⁢to ensure precision and control.

Another mistake many people make is not prepping their eyelids properly before⁤ applying ​eyeliner. To avoid smudging ‌and⁣ smearing, make⁢ sure to prime your eyelids with a good eyeshadow primer or concealer. This ⁣will create a smooth base for your ‍eyeliner application and help it stay in‌ place all day.

One of the biggest challenges when it comes to winged eyeliner⁣ is getting both ​eyes to match.‍ To ensure ‍symmetry, ‌start by drawing a thin line along ⁣your upper lash line, then extend it outwards at a ​45-degree angle. Use⁤ a q-tip dipped in makeup remover to ‌clean up any mistakes and sharpen the‌ wing.

Don’t forget ⁣to take ⁣your time and practice, practice, practice! Winged eyeliner can be tricky, but with patience and perseverance, you’ll soon be a pro at creating ‍the perfect winged eyeliner ‍look. Remember, practice makes perfect, ⁢so don’t be discouraged if it doesn’t look perfect the​ first time around. Keep at‍ it and ⁢soon enough⁣ you’ll be rocking flawless winged eyeliner every time.

Taking⁣ Your ⁣Winged Eyeliner Look‌ to the Next Level with Advanced‌ Techniques

Ready to take your ⁢winged ⁣eyeliner game to the next level? We’ve got you covered with some advanced techniques that will ‍have you mastering the art of the wing in no time!

First⁣ up, let’s talk about creating the perfect wing shape. ⁣To achieve ⁤a flawless wing, start by using a small⁣ piece ⁤of ‍tape at the ⁢outer corner‌ of your eye‍ as⁢ a guide. This will help you create‍ a sharp and precise wing every time. ⁤Once you have your guide in place, ⁣use a gel or liquid eyeliner‍ to draw a line from the outer corner of ‍your eye ⁢towards the end of your eyebrow. Then, connect the top of the line back towards⁤ your lash line to create the wing shape.

Next, let’s talk about perfecting the flick. To create a sleek and precise flick, angle your⁢ brush or pen upwards towards ‌the end‌ of your eyebrow. Use short, controlled strokes to gradually build up the⁤ thickness of the⁣ wing. Remember, practice makes ⁢perfect, so don’t‍ be afraid to experiment with different angles and techniques until you find what works best for you.

Looking to amp⁣ up your winged eyeliner look even further? Try experimenting with different colors and finishes. Bold⁢ colors like navy blue or metallic finishes can add a fun and unexpected⁤ twist to your classic winged eyeliner look. Don’t be afraid to step out of your comfort‌ zone and‍ get creative with ‌your winged eyeliner!

In conclusion, mastering the ⁣art of winged ⁢eyeliner is⁢ no ‌easy feat, but⁣ with the right tips and tricks, you⁢ can ⁤achieve the perfect look every time. From choosing the right products to mastering the flick, practice makes perfect when it comes to winged eyeliner. ​So, don’t be afraid to experiment and get creative with your looks. Remember, confidence is key‍ when rocking​ a fierce winged eyeliner look. So go⁤ ahead,‌ channel your inner beauty guru and strut your ⁢stuff with confidence!‌

FacebookTwitterPinterestEmail